- 18th February 2020
- Posted by: marvelcmedia
- Categories: Adobe Illustrator, Graphic Design

Adobe Illustrator is a very interesting and powerful tools that you can do a lots with
when it comes to design, But as a beginner there are basic techniques you need to
understand as you progress on the path of becoming a professional Graphic designer or
Illustrator and one of the is clipping mask.
There are lots of hidden techniques that you need to get familiar with when designing
with illustrator and one of them is power Clipping or Clipping mask.
In this tutorial we are using Adobe Illustrator CS6 to clip and image in a path.
To start, we first have to open our Illustrator CS6 on our computer, I will assume you are
familiar with Adobe Illustrator interface already as we proceed. Therefore Open your
software located on your computer, I don’t know where you have your software’s shortcut
but here is my desktop task-bar.
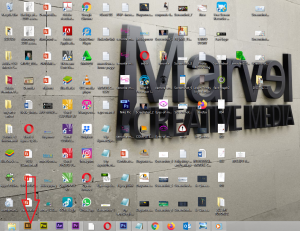
Now I click on Illustrator Icon or logo on my task-bar, that is the lower part of my
desktop as shown in the screenshot below, wait till your software done loading, once your
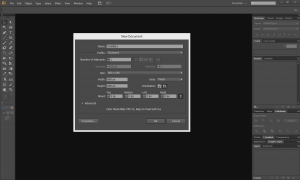
interface is ready then click on FILE at the upper left hand corner, Click NEW to open
working area called Artboard in Illustrator. We don’t actually need a specific dimension for
this tutorial purpose , just click OK below and your work space or Artboard is opened
then we begin.

What we are going to work on here is an Image, we want to Clip or apply a clipping mask on an Image with a rectangular
path, after clipping then we do some few editing on the in which image is clipped, and
few editing on image as well.
Now Let us bring in our image by clicking FILE menu once again, then scroll down on all
the option and click on PLACE. The image we are using for this tutorial is located in MY
PICTURE Folder on my computer., I select the Image and clip OPEN.

Now i have my image displaying on my work-space or Art board, as displays in the screenshot
above. You will notice that the image is bigger that or Art board, Now I want to make a
path that is the same size of my Art board right on top of our chosen image , See the
Screenshot below.

Now go to your MENU on Illustrator CS6, Click on SELECT, the click on SELECT ALL or you
can also click on the rectangular path then press SHIFT on window PC or ALT on Mac then
select the image all together, then go back to your software menu above, click on OBJECT,
check all the options down and click on CLIPPING MASK or rather press CTRL+7 or (CMD +7
on Mac) on your keypad and you see you image clipped in the rectangle path.

Note that you can clip anything in illustrator whether image or vector into a path in
Adobe illustrator CS6.
Clipping object in a path is not the end, you can also edit both the path and the content, whereas the content is the image clipped in the path.
To edit the path and the content(image) what you do is double click on the path, then
click again, that is meant to separate the path and the image for easy editing, if you
drag the path, you notice the image is also get dragged in-proportionately and get the
image deformed. So once you double click and on it there will be separation in layers and
editing can be easily done .

You can decided to apply color to the path , see the screenshot below:

and you can also reduce the opacity of the image or content so that the color applied on
the path can be visible.
I am sure this article has touched all the internet visitors, its really really
pleasant paragraph on building up new website.
Hello, i think that i saw you visited my blog so i came to “return the favor”.I’m attempting to find things
to enhance my web site!I suppose its ok to use a few of your ideas!!
Hi there, I discovered your web site via Google
while searching for a comparable subject, your site came up, it seems
good. I have bookmarked it in my google bookmarks.
Hi there, just become alert to your blog through Google, and found
that it is truly informative. I’m gonna be careful for brussels.
I will be grateful if you happen to continue this in future.
Numerous people will probably be benefited out of your writing.
Cheers!
A person essentially lend a hand to make severely articles I’d state.
This is the first time I frequented your web page and up to now?
I amazed with the research you made to create this particular publish
extraordinary. Excellent task!
Fantastic goods from you, man. I’ve understand your stuff previous
to and you are just too excellent. I really
like what you’ve acquired here, really like what you are stating and the way in which you say it.
You make it enjoyable and you still care for to keep it sensible.
I can’t wait to read far more from you. This is really a tremendous site.
What i do not understood is if truth be told how you’re no longer really
a lot more neatly-liked than you may be right now.
You’re so intelligent. You recognize therefore significantly in relation to this topic, made me personally
believe it from so many varied angles. Its like men and women don’t seem to be involved unless it’s something to do
with Woman gaga! Your personal stuffs excellent. At all times handle it up!
Good day! Do you know if they make any plugins to assist with
SEO? I’m trying to get my blog to rank for some targeted keywords but I’m not seeing very good results.
If you know of any please share. Appreciate it!
hi!,I like your writing so a lot! share we keep in touch extra
approximately your post on AOL? I need an expert in this area to solve my problem.
May be that’s you! Having a look forward to look you.
What i don’t understood is in reality how you’re no longer actually
a lot more smartly-favored than you may be now. You are so intelligent.
You recognize therefore significantly relating to
this matter, made me in my opinion consider it from so many various
angles. Its like women and men aren’t interested unless it is something to do with Woman gaga!
Your personal stuffs outstanding. All the time maintain it up!
Hello I am so happy I found your web site, I really found you by accident, while I was
searching on Askjeeve for something else, Regardless
I am here now and would just like to say cheers for a remarkable post and a all round interesting blog (I also love the theme/design), I don’t have time to look over it all at the moment but I have bookmarked it and also added in your RSS feeds, so when I have time I will be back to read much more, Please do keep up the awesome work.
Terrific article! That is the kind of info that are supposed to be shared around the net.
Disgrace on the seek engines for no longer positioning this publish higher!
Come on over and visit my web site . Thank you =)
fantastic points altogether, you simply won a new reader.
What might you recommend in regards to your publish that you
made some days in the past? Any certain?
Nice response in return of this matter with firm arguments and telling the whole thing about that.
Hello there! This post could not be written any better!
Reading this post reminds me of my previous room mate! He always kept chatting about this.
I will forward this write-up to him. Pretty sure he will have a good
read. Thank you for sharing!
Hello, i think that i saw you visited my site so i came to “return the
favor”.I am attempting to find things to enhance my
site!I suppose its ok to use a few of your ideas!!
Hurrah, that’s what I was searching for, what a information! existing here at
this webpage, thanks admin of this website.
I blog frequently and I genuinely thank you for your content.
This great article has truly peaked my interest. I will book mark your
website and keep checking for new details about once per week.
I subscribed to your RSS feed too.
Hi, I do believe this is an excellent blog.
I stumbledupon it 😉 I’m going to revisit yet
again since I book marked it. Money and freedom is the greatest way to change, may you be rich and continue to help other people.
Hi! I know this is kind of off topic but I was wondering if you knew where I could find a
captcha plugin for my comment form? I’m using the
same blog platform as yours and I’m having difficulty finding one?
Thanks a lot!
Hello, yup this piece of writing is actually pleasant and I have learned lot of things from it about
blogging. thanks.
Have you ever considered creating an ebook or guest authoring on other websites?
I have a blog based upon on the same topics you discuss and would love to
have you share some stories/information. I know my readers would appreciate your work.
If you are even remotely interested, feel free to send me an e mail.
I’m impressed, I must say. Rarely do I encounter a blog that’s both educative and amusing, and
without a doubt, you’ve hit the nail on the head.
The problem is an issue that too few men and women are speaking
intelligently about. Now i’m very happy I came across this
in my hunt for something relating to this.
Hello There. I found your blog the use of msn. That is a very smartly written article.
I’ll make sure to bookmark it and return to learn more of your helpful information. Thank you for the post.
I will certainly return.
My spouse and I stumbled over here different web address and thought I might check things
out. I like what I see so now i’m following you. Look forward to looking into your web
page yet again.
Hi, I do believe this is an excellent blog. I stumbledupon it
😉 I may return once again since I saved as a favorite it.
Money and freedom is the best way to change, may you be rich and continue
to help other people.
My brother suggested I might like this web site. He was totally right.
This post actually made my day. You cann’t imagine just how much
time I had spent for this info! Thanks!
Generally I don’t move through article just for blogs,
nonetheless I wish to document this setting very expected me to accomplish so!
Your company’s writing tastes has been shocked me. Thank you much,
quite outstanding post.
I adore reading history that can acquire people to think.
Also, many thanks to get allowing for myself to present responses!
Excellent post. I was checking continuously this blog
and I am impressed! Extremely helpful information specially
the last part 🙂 I care for such info much. I
was looking for this particular info for a long time. Thank you and best of luck.
There’s certainly a lot to know about this issue.
I like all of the points you have made.
If some one needs expert view concerning blogging and site-building then i advise him/her
to go to see this webpage, Keep up the pleasant work.
Quality content is the important to attract the people to pay a quick visit the
web page, that’s what this site is providing.
Good day! I just want to offer you a huge thumbs up for your great information you have got right here
on this post. I will be coming back to your web site for more soon.
Superb blog! Not long ago i found it while surfing around in Yahoo
Info. Do you have almost any tips on how to
acquire listed in Askjeeve News? I personally use personally been thinking about for a while although
I by no means seem to show up! Many thanks
Howdy just wanted to give you a brief heads up and
let you know a few of the images aren’t loading correctly.
I’m not sure why but I think its a linking issue.
I’ve tried it in two different web browsers and both show the same outcome.
It’s nearly impossible to find educated people for this subject, but you seem like you know what you’re talking about!
Thanks
Great information. Lucky me I recently found your website by chance (stumbleupon).
I’ve saved it for later!
This site was… how do you say it? Relevant!!
Finally I have found something that helped me. Appreciate it!
Asking questions are actually pleasant thing if you are not understanding anything entirely,
except this article gives fastidious understanding
yet.
What’s up, after reading this amazing post i am too cheerful to share my familiarity here with mates.
Simply wish to say your article is as astounding.
The clarity to your publish is just excellent and
that i could think you are knowledgeable in this subject.
Well together with your permission allow me to grab your
feed to keep updated with approaching post.
Thanks one million and please continue the enjoyable work.
Now I am ready to do my breakfast, later than having my breakfast coming over again to read more news.
Hi there, after reading this amazing article i am too cheerful to share my experience here
with friends.
Hello there, I discovered your web site by way of Google even as
searching for a related subject, your web site came up, it seems
good. I have bookmarked it in my google bookmarks.
Hello there, just was alert to your weblog thru Google, and found that it is really informative.
I’m going to be careful for brussels. I’ll appreciate
in the event you continue this in future. Many other people can be benefited out of your writing.
Cheers!
I am extremely impressed with your writing skills and also with the layout
on your weblog. Is this a paid theme or did you modify it yourself?
Either way keep up the nice quality writing, it is
rare to see a nice blog like this one today.
Very good post! We will be linking to this great post on our site.
Keep up the good writing.
Wow, fantastic blog structure! How long have you ever been blogging
for? you make blogging look easy. The total look of your website is wonderful,
let alone the content material!
Thanks for the good writeup. It actually was once a amusement account it.
Look advanced to far delivered agreeable from you! By the way, how could we keep up a correspondence?
Saved as a favorite, I like your blog!
I could not resist commenting. Exceptionally well written!
This information is priceless. Where can I find out more?
At this time I am going to do my breakfast, after having my breakfast
coming yet again to read other news.
what a lovely topic !
What a fantastic write up
This is so perfect!
https://marvelnaija.com
Greate pieces. Keep writing such kind of information on your page.
Im really impressed by it.
Hi there, You have done an excellent job. I’ll certainly
digg it and in my view suggest to my friends. I’m sure they’ll be benefited from this
web site.
Very good info. Lucky me I found your blog by accident (stumbleupon).
I’ve saved it for later!
I simply couldn’t go away your website before suggesting
that I really enjoyed the usual information an individual provide on your visitors?
Is going to be again regularly in order to check out new posts
Aw, this was a very nice post. Taking a few minutes and actual effort to produce a top notch
article… but what can I say… I hesitate a lot and don’t seem to get anything done.
I do agree with all the ideas you’ve presented for your post.
They are really convincing and can certainly work. Still, the posts are too quick for starters.
Could you please lengthen them a little from next time?
Thanks for the post.
You actually make it appear really easy along with your presentation but I
find this topic to be actually something which I think I’d by no means understand.
It sort of feels too complex and extremely huge for me. I am looking
ahead on your next put up, I will try to get the hold of it!
I am not sure where you are getting your information, but good topic.
I needs to spend some time learning more or understanding more.
Thank you for great information I used to be on the lookout for this information for
my mission.
That is very attention-grabbing, You are an overly professional
blogger. I’ve joined your rss feed and stay up for in search
of more of your great post. Additionally, I’ve shared your web site in my social
networks
I always used to study post in news papers but now as I am a user of web therefore from now I am
using net for articles or reviews, thanks to web.
You can definitely see your enthusiasm within the work you write.
The world hopes for more passionate writers like you who aren’t afraid to say how
they believe. All the time go after your heart.
I love you blog
What a fantastic article
Lovely